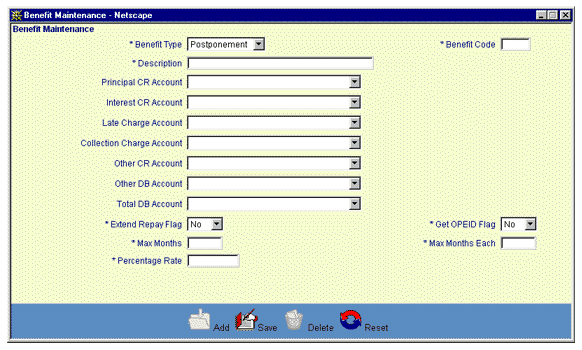
To add a new Benefit record, click the Add icon located in the Function Bar. When this icon is clicked, a new window is opened (see example below) that contains the following:
A data entry form to be used for entering the new Benefit information
A function Bar that contains Save, Delete and Reset icons. The Delete icon is disabled.

The user then enters the benefit information into the appropriate fields. All fields are required entry.
Click on this link: Data Entry and Edit Guidelines to review information pertaining to what values may be entered into the various fields of the Benefit Information entry form.
Click on this link: Benefit Information for a description of the purpose of the various fields found on the Benefit Information entry form.
Click on the Reset icon to restore the data entry form to its initial (blank) state. Any data that was entered in the form will be erased from the display.
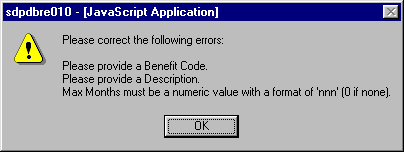
To save the Benefit information, click on the Save icon. Clicking the Save icon will trigger an edit process that validates the user-entered data. If there are any errors, they will be displayed in a pop-up dialog box as shown in this example:

Click on the OK button to acknowledge the errors and return to the entry form. Modify the field(s) in error and again click the Save button.
If there are not any edit errors, the new Benefit information will be written to the database and the Benefit Information entry window will be closed.
To exit this process without saving the Benefit information, simply click on the Benefit List browser window at any time to close the pop-up Benefit Information data entry window.