![]()
This screen function provides access to information pertaining to the benefits that have been applied to the loan (if any). A list of benefits is presented; when a benefit is selected, information pertaining to the benefit can be maintained.
The function is accessed by (1) selecting a loan from the Loan List via the associated radio button, and then (2) selecting the Benefits item from the drop-down box that appears at the top of the Loan List display. When the Benefits item is selected, a new window is opened that contains the following:
If the selected loan has not had any benefits applied to it, the window will contain an informational message to that effect (as shown in the following example). No further action is possible using this function until a benefit has been applied to the loan.

If the selected loan has had one or more benefits applied to it, the window will contain a selection list of those benefits (as shown in the following example):

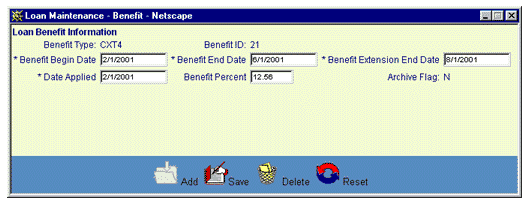
Select the desired benefit by clicking on the magnifying glass icon located on the left of the associated line in the Benefits List window. When a benefit is selected, a new window is opened that contains the following:
An update form that is populated with information from the associated Loan Benefit data record.
A function Bar that contains Add, Save, Delete and Reset icons. The Add icon is disabled.

The user updates the loan benefit information by entering or revising data in the appropriate fields. The following fields are required entry:
Benefit Begin Date (* Benefit Begin Date on the screen)
Benefit End Date (* Benefit End Date on the screen)
Benefit Extension End Date (* Benefit Extension End Date on the screen)
Benefit Applied Date (* Date Applied on the screen)
The Archive Flag will be a read-only value until the loan is deleted. Once deleted, the Archive Flag value will be represented as a drop-down box. The value can thereby be set to "No" to undelete the record.
Click on this link: Data Entry and Edit Guidelines to review information pertaining to what values may be entered into the various fields on the Loan Maintenance - Benefit Information update form.
Click on this link: Loan Benefit - General Information for a description of the purpose of the various fields found on the Loan Maintenance - Benefit Information update form.
Click on the Reset icon to restore the entry/update form to its initial state. Any (unsaved) entries or updates which were made will be reversed.
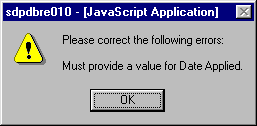
To save the revised loan benefit information, click on the Save icon. Clicking the Save icon will trigger an edit process that validates the user-entered data. If there are any errors, they will be displayed in a pop-up dialog box.

Click on the OK button to acknowledge the errors and return to the entry form. Modify the field(s) in error and again click the Save button.
If there are not any edit errors, the updated loan information will be written to the database, and the pop-up update window will be closed. The Benefits List will be updated (if appropriate) to reflect the revised loan information.
To exit this process without saving the loan benefit information updates, simply click on the Benefits List or Loan List, or choose another function from the Office Management Navigation bar. The pop-up Loan Maintenance - Benefit Information window will be closed.
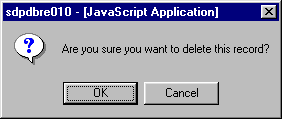
To delete the displayed loan information, click on the Delete icon. Clicking the Delete icon will trigger the display of a pop-up dialog box that requests the user to confirm the Delete action. For example:

Click on the OK button to acknowledge the Delete action. The associated loan record will be deleted from the CLM database and the pop-up Loan Maintenance - Benefit Information window will be closed.
Please note: This action will delete ONLY the Loan Benefit data record. The associated Loan Origination, Main, Exit and Financial records will not be deleted. These records should also be deleted to ensure a consistent CLM database.